- Introducing Weight Freeze – Now Reduce Your Weight Discrepancies in a Few Clicks
- Reduce the Risk of RTO with Shiprocket Order Verification
- We Have Added the Dangerous Goods Rule to Your Advanced Courier Priority Settings
- Introducing Branded Shipping Label – An Innovative Way to Increase Brand Awareness
- Conclusion
This month, we focused on giving you better control over your shipments with our newest features like order verification and weight freeze. Let’s look at these changes in more detail and see what they mean for you.

Introducing Weight Freeze – Now Reduce Your Weight Discrepancies in a Few Clicks
No one likes the constant hassle of resolving weight discrepancies as it takes a lot of time and effort. To help you out, we have come up with a solution that removes weight errors from all your future shipments*. Weight Freeze is a one-time process where you need to upload the images of your product and packaging. After successful verification, you will be able to ship your products without worrying about weight discrepancy. Please follow the steps below to know how to make a weight freeze request:
- Go to Channels from the left menu and click on Weight Freeze.
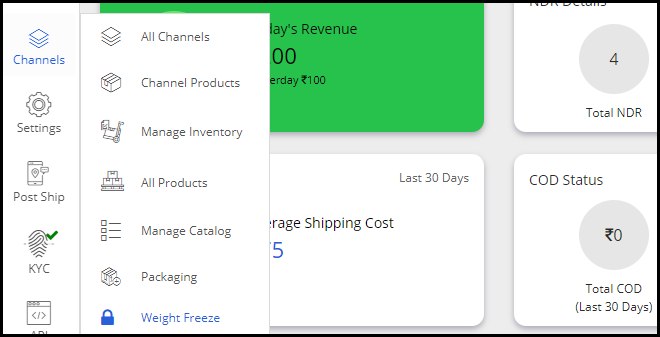
- Here you can either request a weight freeze for your existing products or import new products.
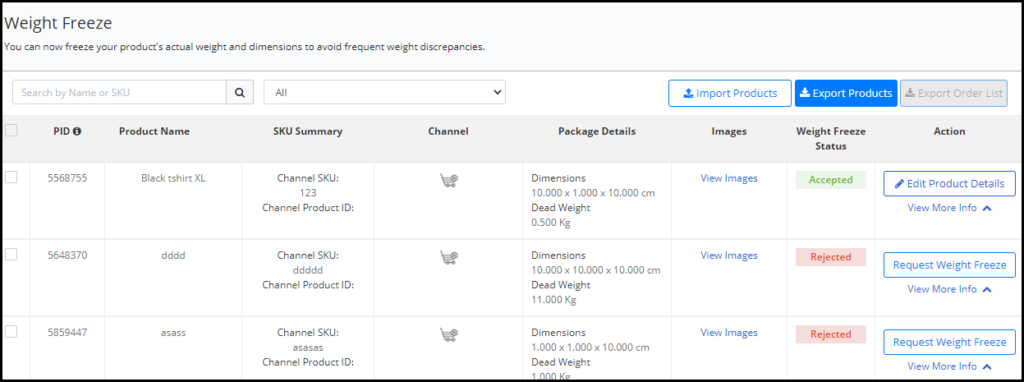
- Click on Request Weight Freeze for your preferred SKU and fill out the form.
- Upload at least 1 product image and three final package images. Keep the length, width, height and actual weight of the product visible in the photographs.
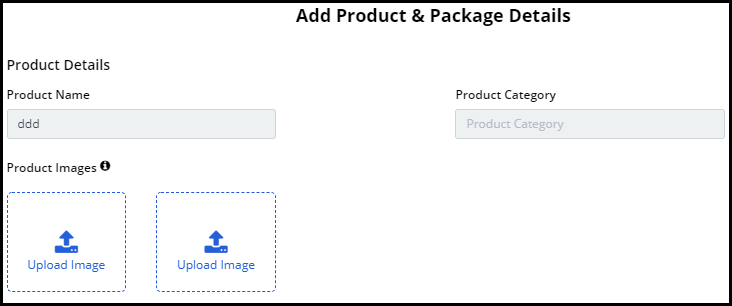
- Next, add the weight and dimensions of your package.
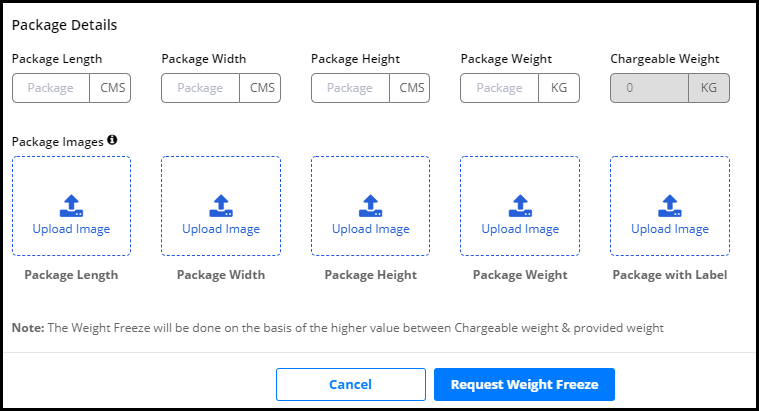
- After submitting the request, you can track its status from the Weight Freeze panel. We’ll also share the same via email and SMS.
Reduce the Risk of RTO with Shiprocket Order Verification
Impulse buying can catalyze sales for your eCommerce store, but it also increases the chances of getting RTOs. To save you from doorstep order cancellation and extra RTO charges, we now give you an option to confirm your Prepaid and COD orders before courier assignment. It gives you better control over your shipments and reduces failed deliveries at the same time.
Steps to be followed:
- Go to Settings from the left menu and click on Company
- Here, click on the Shipment Settings tab and turn the toggle to enable Order verification.
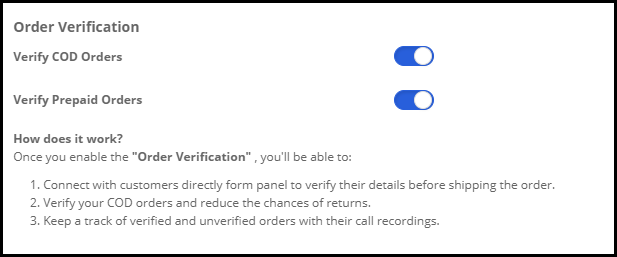
- You can now verify your orders before shipping.
How to verify your orders?
- Go to Orders from the left menu and click on Process Orders.
- You can either confirm your order offline or call your buyer directly from your account.
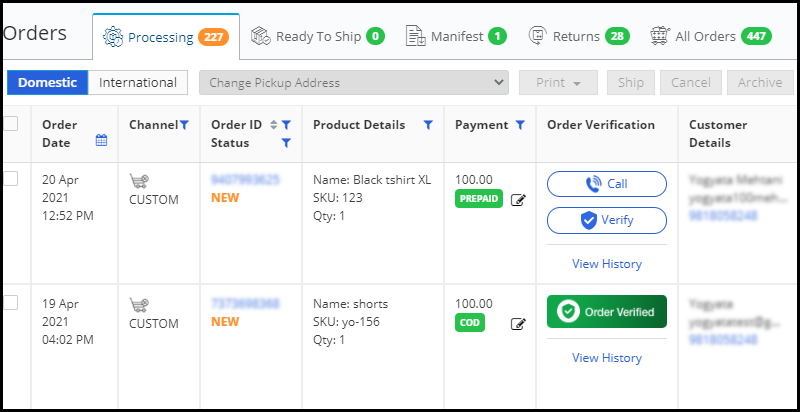
- In the pop-up, select your contact number to initiate the call.
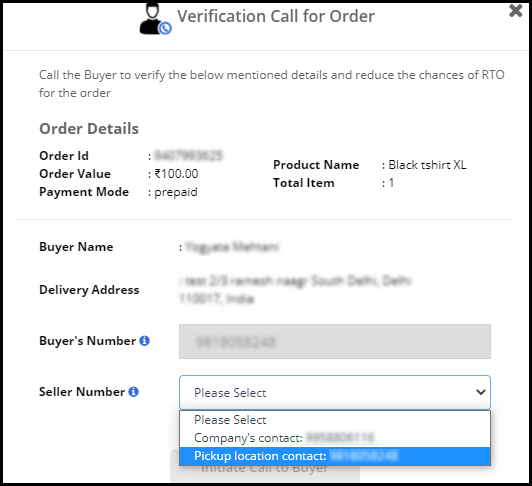
- Finally, click on the Verify Order button to complete the verification process.
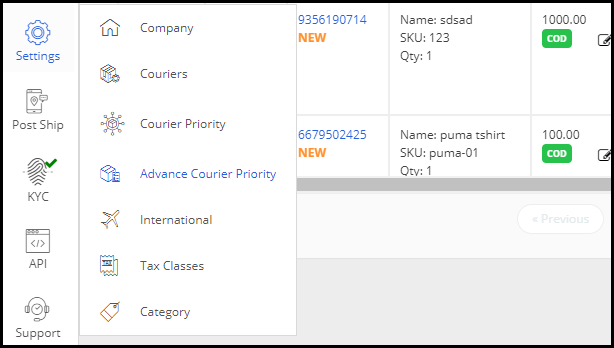
We Have Added the Dangerous Goods Rule to Your Advanced Courier Priority Settings
You can now easily segregate couriers based on their eligibility for shipping dangerous goods. This rule is especially beneficial for those who ship products such as perfumes, mobile phones, hairspray, batteries, paints as these products are not allowed in an Aircraft.
Note: Advanced Courier Priority feature is available only on our Enterprise and above plans.
To know how to apply the Dangerous Goods (DG) rule, follow the steps below:
- Go to Settings from the left menu and click on Advanced Courier Priority.
- Scroll to the end and click on Add New Rule.
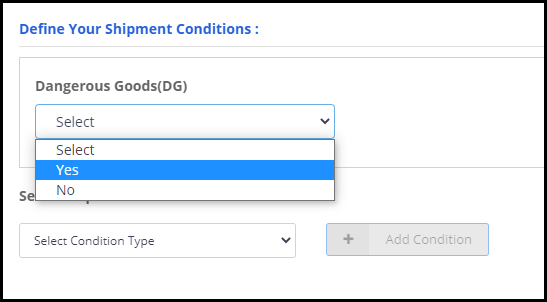
- Add a name for your shipping rule. Next, select your shipment conditions. Here, you will find the Dangerous Goods condition.
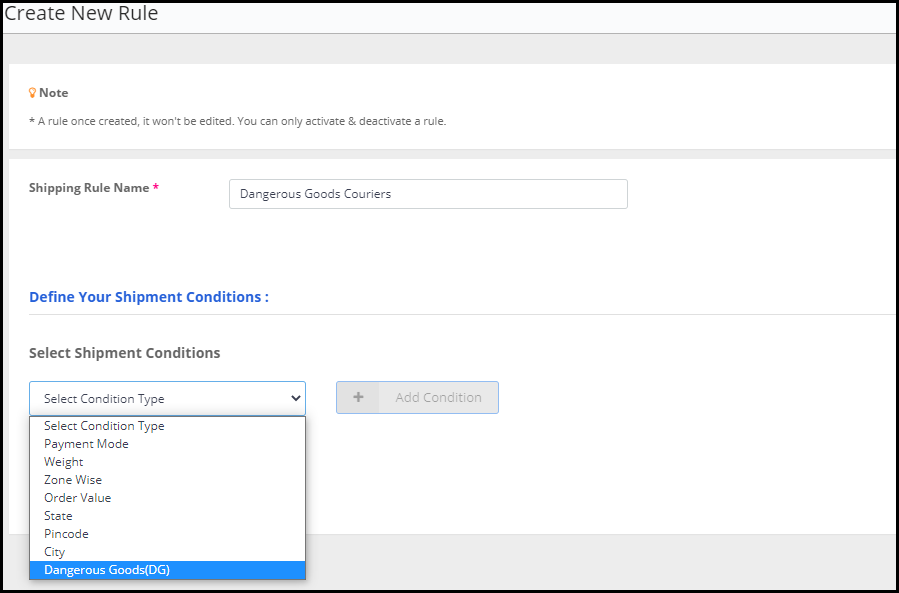
- Complete all the steps as per your preference and click on Proceed.
- It will take you to the next screen, where you will find all couriers in the surface mode.
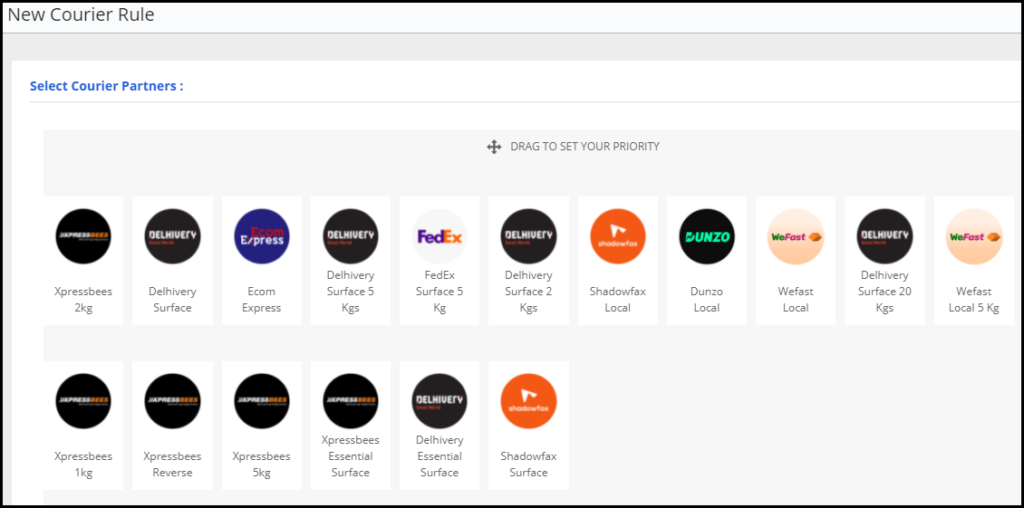
- Prioritize the couriers as per your business needs and click on Save to add this shipping rule.
Introducing Branded Shipping Label – An Innovative Way to Increase Brand Awareness
A brand identity gives consumers a long-term impression. By making minimal yet consistent efforts, you can create a positive association in your customers’ mind towards your brand. To make it possible at every step of your eCommerce, we have started giving you an option to add your brand logo to your shipping labels and invoices.
Steps to be followed:
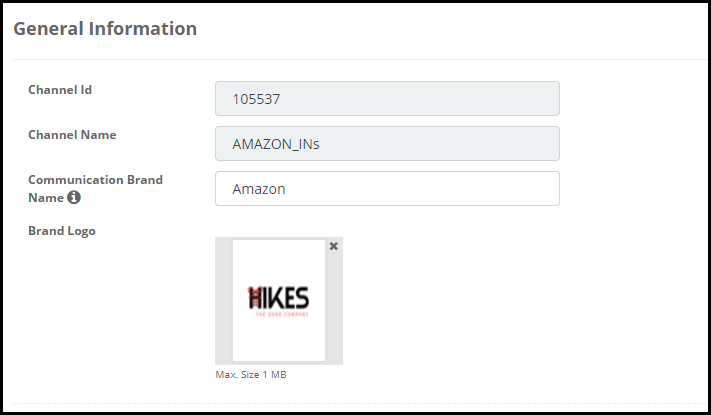
- Go to Channels from the left menu and select All Channels.
- Click on the Edit button to upload your brand logo for your preferred channel. We’ll use the appropriate logo for each order based on the source channel.
- Next, go to Settings -> Company -> Change Label.
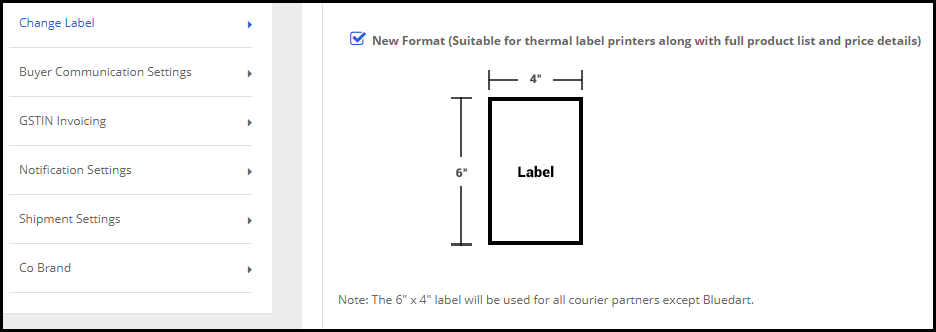
- Select the third label format for displaying your logo on the shipping label.
Conclusion
Keep an eye on this space because we are working on some exciting features that will help you simplify your eCommerce shipping and fulfillment process.